How to Make a Bioactive Tank Substrate (Materials & Steps)
Bioactive substrates are increasingly growing in popularity among both beginners and experienced reptile owners. Nevertheless, many pet parents are still confused about how to properly create one!
Generally, bioactive substrates for reptile tanks are made with five essential components: 1) drainage layer, 2) foundational soil mix, 3) biodegradable organic materials, 4) live plants, and 5) custodians or detritivores.
I would like to make one thing clear: naturalistic substrates and bioactive substrates are not the same. Though it is common to see naturalistic setups with loose substrate mixes and live plants, it won’t provide the same benefits as a well-established bioactive setup.
Learn more in our article discussing the advantages and pitfalls of a bioactive substrate.
Or you could check it after finishing this article!
1. Drainage
A drainage layer is the first and the very bottom layer of a bioactive setup. This is made of clay balls and a separator on top. Such a layer helps stabilize optimal environmental conditions in the tank.
Although many suggest that including a drainage layer is only required for humid reptile enclosures, it is also recommended to add this as the first layer in a bioactive substrate.
More often than not, a single type of material is used for the entire drainage layer. Others use smooth pebbles and gravel for the drainage layer but they are heavy and less efficient when it comes to soil retention so I don’t recommend them.
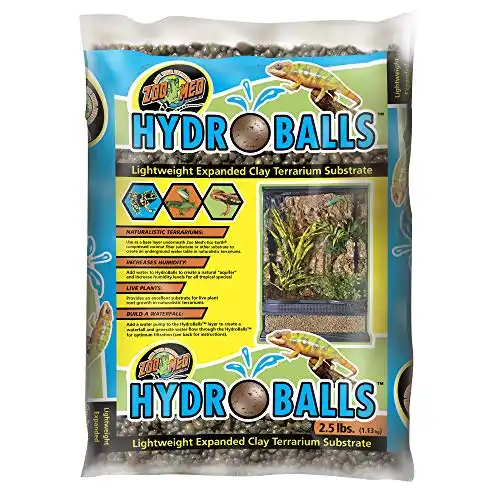
Common drainage materials for herp tanks include Light-weight Expanded Clay Aggregate (LECA)—more popularly known as clay balls (as the one below —lava rocks, and even perlite.
These are highly porous materials that will help collect and store excess water that will seep out of the foundational soil layer on top of it.
Aside from that, a bioactive substrate’s drainage layer also helps with the following:
- Prevents oversaturation of the soil layer
- Ensures that plants are not overwatered
- Inhibits root rot which can kill plants
- Helps with sufficient soil aeration
- Keeps soil quality good
- Provides moist breeding grounds for custodians
- Replicates natural conditions for burrowing
- Aids in maintaining ideal humidity levels
- Lets keepers visually monitor the lack/excess of water
Pro Tip: Never let water stagnate and reach or surpass the very top of the drainage layer in a bioactive substrate. Always check the water level in the drainage layer of the bioactive substrate before misting the tank or watering the plants.
Not Only for Tropical and Temperate Reptile Tanks
As you probably already know, arid setups shouldn’t become overly humid because of bioactive substrates that are too saturated with water. So, hopefully, you can see why a drainage layer is essential regardless of the specific setup you will be making.
I have also found advanced humid setups that make it easy to drain excess water from the bottom of the tank. This is great because you would not need to disturb the upper layers of the bioactive substrate to easily and properly get rid of all the extra water.
Keep It Separated
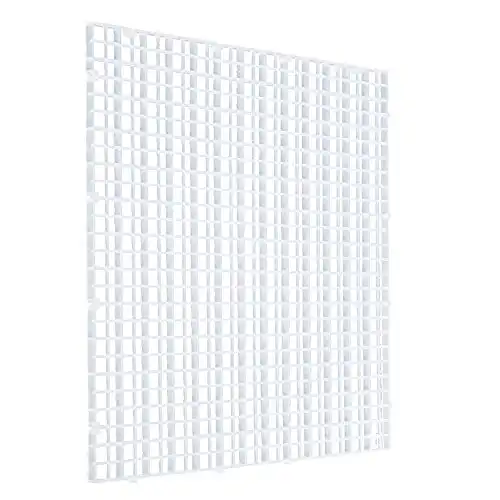
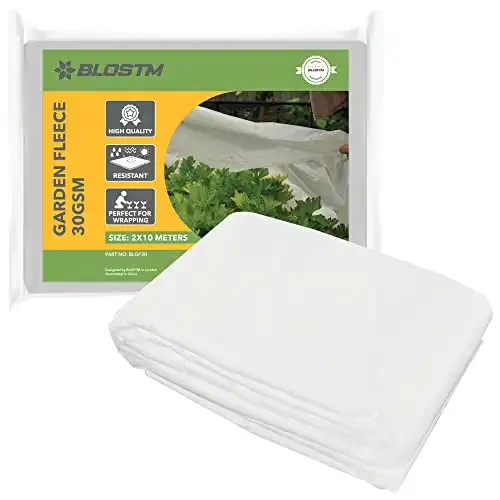
Before adding the next layer to the bioactive, reptile keepers need to secure the drainage layer with a sturdy but permeable material such as:
- Landscape fabric
- Breathable plant cover (as the one shown below)
- Multi-purpose burlap garden liner
- Fiberglass window screen
- Rigid plastic mesh
- Plastic egg crate (as the one shown below)
It is essential in keeping the drainage and the soil layer separated. Otherwise, your soil mix will clog up the drainage layer over time, especially with regular misting. So in choosing your separator, consider the size of the gaps in the material—finer gaps are better.
2. Soil Mix
The foundational soil mix is the second and thickest layer comprising the bioactive substrate. This layer is predominantly composed of topsoil and other materials such as sand, clay, and coco coir.
Besides providing your pet with a realistic tank flooring, a bioactive substrate will also function as the growing medium for live plants and provide shelter for the clean-up crew (or microfauna).
When deciding on what to add to your pet reptile’s bioactive soil mix, you need to think of their natural habitats. Depending on the type of reptile setup, ingredients, and composition used to create the soil mix vary greatly.
Of course, unless you are keeping native reptiles, it would be impossible to give them a soil mix that’s identical to what they would have in the wild. But you could still try your best to replicate it as closely as possible with available materials at hand.
Below are common ingredients used in creating bioactive soil mixes for reptile tanks:
- Pesticide- and fertilizer-free topsoil or plain potting soil
- Natural fine sand or play sand
- Unscented clay
- Coconut fiber and/or coconut coir
- Mulch or leaf mold
- Different types of moss (e.g., sphagnum, peat, sedge peat)
- Tree fern fiber
- Fir or orchid bark
- Crumbled dry leaves (e.g., oak, magnolia)
- Decomposed granite or gravel
- Horticultural or activated charcoal
These differ in terms of texture, particle size, aeration, and water-retention capabilities. Hence, different soil recipes will result in different soil qualities and structures.
Humid VS Arid Bioactive Soil Substrate Mixes
| Type of Bioactive Reptile Setup | Base Soil Mix | Additional Components |
| Humid | Topsoil Coco coir | Sand Clay Mulch Moss Fern fiber Orchid bark Dry leaves |
| Arid | Topsoil Sand Clay | Moss Dry leaves Granite or gravel |
Reptiles native to humid areas such as tropical and temperate forests will do well with a soil mix that helps produce and maintain moderate to high humidity levels in the enclosure. To recreate this, you would want a bioactive substrate mix primarily made of soil and coco coir.
In contrast, species from arid areas such as rocky grasslands and deserts require a considerably drier tank flooring—for low to moderate humidity. You can replicate this with a substrate base made predominantly of topsoil, sand, and clay.
Ditch the Charcoal!
Interestingly, I have come across people that say that charcoal, in particular, is very important in creating a good soil base. But in reality…
Charcoal is not an essential ingredient for a good bioactive substrate.
Sure, it helps eliminate unnecessary impurities like ammonia but it can only do so up to a certain point before it needs to be replaced. Moreover, a well-established bioactive substrate already accounts for and controls for such a factor.
3. Biodegradables
Biodegradable or organic materials make up the topmost layer of a reptile tank’s bioactive substrate. This is key to retaining moisture in the soil mix, providing shelter and food for microfauna, and supplying nutrients for live plants.
Normally, when people talk about leaf litter or mulch, they are referring to biodegradable substrate toppers. This gives the impression that only leaf litter only refers to dry and decaying leaves alone.
However, leaf litter is actually used as a collective term for all dead plant materials including items such as twigs and bark. Other than those, you could also add pieces of cork and sphagnum moss.
The Five Key Ingredients for Bioactive Substrates
Over time, these materials will break down with the help of your tank custodians. Afterward, they will get incorporated into the soil to provide good nutrients for your colorful plants.
You could also add some coco coir for better moisture retention on the surface of your bioactive substrate. Adding a couple of stones and pebbles could also improve the look and texture, giving it a more naturalistic feel.
4. Live Plants
A good bioactive substrate should have a variety of live plants for the specific reptile setup. Tropical plants are recommended for humid tanks, whereas drought-resistant plants are more suited for arid tanks.
As with soil mixes, you have to put in time and effort into selecting live plants that are compatible with the environmental conditions in your scaly pet’s tank. Such factors include:
- Soil
- Water
- Humidity
- Lighting
- Heat
For instance, if you place a succulent in a tropical tank, then you shouldn’t expect it to live a long life in your humid reptile tank. Refer to the table below for a list of good plants you can keep alive in a humid or an arid reptile enclosure
| Type of Bioactive Reptile Setup | Suitable Live Plants |
| Humid | Areca palms (Dypsis lutescens) Asparagus ferns (Asparagus spp.) Begonias (Begonia spp.) Bird’s nest fern (Asplenium nidus) Bromeliads (Bromeliaceae spp.) Calatheas (Calatheas spp.) Chinese evergreens (Aglaonema spp.) Coleus (Plectranthus spp.) Corn plants (Dracaena spp.) Creeping fig (Ficus pumila) Dwarf umbrella plant (Schefflera arboricola) False spirea (Astilbe spp.) Grape ivy (Cissus alata) Golden pothos (Epipremnum aureum) Hibiscus (Hibiscus spp.) Nerve plants (Fittonia spp.) Orchids (Orchidaceae spp.) Parlor palm (Chamaedorea elegans) Peace lily (Spathiphyllum wallisii) Peperomia plants (Peperomia spp.) Pilea plants (Pileas spp.) Polka dot plants (Hypoestes spp.) Ponytail palm (Beaucarnea recurvata) Prayer plant (Maranta leuconeura) Rubber plant (Ficus elastica) Snake plants (Sanseveria spp.) Spider plant (Chlorophytum comosum) Swiss cheese plant (Monstera deliciousa) Sword ferns (Nephrolepis spp.) Ti plants (Cordyline spp.) Wandering Jew (Tradescantia zebrina) Weeping fig (Ficus benjamina) |
| Arid | Agaves (Agave spp.) Air plants (Tillandsis spp.) Aloes (Aloe spp.) Basil (Ocimum basilicum) Burro’s tail cacti (Sedum spp.) Christmas cactus (Schlumbergera bridgesii) Corn plants (Dracaena spp.) Dancing bones cactus (Hatiora salicorniodes) Ebony wax agave (Echeveria agavoides ‘Ebony’) Elephant bush (Portulacaria afra) Fountain grass (Pennisetum alopecuroides ‘Desert Plains’) Gasterias (Gasteria spp.) Golden pothos (Epipremnum aureum) Heartleaf iceplant (Aptenia cordifolia) Hens and chicks (Echeveria spp.) Houseleeks (Sempervivum spp.) Jade plant (Crassula ovata) Lady’s mantle (Alchemilla spp.) Living stones (Lithops sp.) Philodendrons (Monstera spp.) Ponytail palm (Beaucarnea recurvata) Pothos (Epipremnum spp.) Snake plants (Sanseveria spp.) Spider plants (Chlorophytum comosum) Spineless prickly pear (Opuntia ellisiana) String of bananas (Senecio radicans) String of pearls (Senecio rowleyanus) Turtle vine (Callisia repens) Yucca plants (Yucca spp.) Zebra cacti (Haworthia spp.) |
Note that this is not a complete list. However, it is comprehensive enough for you to be able to pick several beautiful plants for your reptile enclosures.
Check our article on the best plants for leopard geckos for a more specific recommendation list.
Having live plants is important in a bioactive reptile setup for the following reasons:
- These help improve air quality
- Provide shelter, shade, and security
- Encourages animals to drink water
- Doubles as a food source for herbivores
- Offers a steady supply of substrate toppers
- Serves as a form of enrichment
- Enhances overall tank aesthetics
5. Custodians
Detritivores or custodians are vital in establishing a bioactive substrate in reptile tanks. These are microfauna and invertebrates that consume decomposing matter.
Similar to soil mixes and live plants, certain detritivores are more suitable for humid setups than arid ones and vice versa. Isopods and springtails are essential custodians.
Some would say that custodians are the star when it comes to bioactive builds. But I would honestly beg to differ. If there was no drainage layer, good soil mix, biodegradable toppers, or live plants, then it wouldn’t function as intended.
That said, your clean-up crew still plays an important role that only they can accomplish in keeping a bioactive tank going and thriving.
Bioactive custodians serve the following functions in a reptile enclosure:
- Breaks down droppings, leaf litter, and other uneaten dead feeder insects
- Add nutrients/compost into the soil which live plants will use
- Keeps the soil mix layer aerated through constant movement
- Eliminates unwanted and harmful mites and pests
- Regulates the presence of fungi, mold, algae, and other microorganisms
- Serves as supplementary live food items
- Promotes natural behaviors such as foraging
Some custodians are very versatile—able to live and flourish in a wide variety of setups as long as there are humid spaces. However, others can be highly sensitive—either dying due to either low or high humidity.
| Type of Bioactive Reptile Setup | Recommended Custodians (CUC) |
| Humid | Black soldier fly larvae (Hermetia illucens) Clown isopods (Armadillidium klugii) Dairy cow isopods (Porcellio laevis) Domino cockroaches (Therea petiveriana) Dubia roaches (Blaptica dubia) Dwarf purple isopods (Trichoniscus sp.) Dwarf white isopods (Trichorhina tomentosa) Earthworms (Lumbricus sp.) Little sea isopods (Cubaris murina) Powder blue or orange isopods (Porcellionides pruinosus) Red wiggler worm (Eisenia fetida) Roly-poly (Armadillidium vulgare) Speckled isopods (Porcellio scaber) Springtails (Collembola sp.) Surinam cockroach (Pycnoscelus surinamensis) |
| Arid | Black soldier fly larvae (Hermetia illucens) Buffalo worms and/or beetles (Alphitobius diaperinus) Clown isopods (Armadillidium klugii) Common rough woodlouse (Porcellio scaber) Dubia roaches (Blaptica dubia) Giant canyon isopods (Porcellio dilatatus) Granulated pill isopods (Armadillidium granulatum) Mealworms and/or darkling beetles (Tenebrio molitor) Peach isopods (Armadillidium nasatum) Red runner roaches (Shelfordella lateralis) Roly-poly isopods (Armadillidium vulgare) Springtails (Collembola sp.) Temperate springtails (Folsomia candida) Superworms and/or darkling beetles (Zophobas morio) Yellow dot isopods (Porcellio ornatus) |
Use the table below for reference when choosing what custodians to include in your bioactive reptile setup.
Create Your Bioactive Substrate for Reptile Tanks!
Generally, good bioactive substrates for reptile tanks are established in 9 steps:
- Determine the reptile’s needs
- Map out the design
- Gather all materials
- Arrange the reptile tank
- Start the drainage layer
- Create and add the soil mix
- Mix in the biodegradables
- Transplant all the plants
- Introduce the custodians
Let’s go through all of them one by one!
1. Determine the Reptile’s Needs
Reptile keepers and breeders must determine the reptile’s specific environmental needs such as humidity, lighting, and heating. This must be confirmed before proceeding to the next steps in creating a bioactive substrate.
Skipping this step—the very first one—can cost you a lot in the long run. If you don’t buy soil bases, additives, plants, and microfauna that are suitable for the environment that your reptile needs, you’ll likely have to start over again.
Simply put, without proper research and preparation, you’d be wasting time, resources, and effort!
2. Map Out the Design
You need to plan the design or layout of your reptile enclosure. This will serve as the blueprint of your cold-bellied baby’s house. Without it, you will be doing a lot of guesswork in the next steps!
Also, it is best to ensure that the tank you are planning to use for your bioactive build is big and sturdy enough. This will be helpful when it comes to gathering materials as well.
To give you an idea of reptile tank size: The minimum tank size for small to medium arboreal geckos is a tall 18x18x24-inch tank—and double that for larger species. In comparison, the minimum tank size for small to medium arboreal geckos is a long 36x18x18-inch tank.
3. Gather All Materials
Check out local garden centers, hardware stores, and pet supply stores in your area for all the necessary materials you will need for your bioactive reptile setup build. You could also check out reputable online shops if you want to save on time and effort.
If you’re living in a more rural area or near a forest, you can collect and forage needed organic materials. Just make sure the area is not polluted or contaminated.
As a safety precaution, it’s also advisable for you to sanitize these materials. Scrub stones and rocks thoroughly. Then, boil, bake, or soak plant materials.
I know some people are vehemently against these sterilization processes as they will get rid of potentially beneficial microorganisms and bacteria in such materials. However, I would like to remind you that such factors are already accounted for using biodegradables, plants, and microfauna.
4. Arrange the Reptile Tank
By arrange, I mean build the structures or do the hardscaping before filling the reptile tank with your bioactive substrate ingredients. Such structures include backgrounds, caves, tunnels, bridges, stairs, and ramps.
Common tools and materials used for reptile tank hardscaping include:
- Gloves
- Safety glasses
- Mask
- Carving knife
- Foam cutters (the one I use is shown below)
- Expanding spray foam
- Styrofoam sheets
- 100% silicone
- Animal-safe sealant
- Grout mixture
- Non-toxic paint

Make sure that everything has completely cured and hardened before moving on to the next step.
5. Start the Drainage Layer
Rinse your choice of drainage material and let it dry completely before placing it at the very bottom of your tank floor. Clay balls, in particular, seem to be especially dusty right out of the package. So give those a really good wash—no soap is necessary, clean water will do.
This will prevent excess dust and super fine particles from collecting in the first substrate layer and possibly impeding proper drainage. Fill up the bottom of the tank with the material until no flooring is left exposed. You want a relatively thick 0.5–2-inches drainage layer.
Then top it with your substrate barrier, ideally much larger than the floor area so that it extends a couple of inches around the enclosure walls.
6. Create and Add the Soil Mix
I would recommend mixing your soil recipe in a separate container before adding it to the reptile tank.
You could start by buying a pre-made bioactive soil mix then add other components until you’ve got the right consistency and texture you are aiming for. Or you could start with separate ingredients and come up with your own substrate recipe right off the bat.
Do note that you don’t need to fully mix this together. It’s perfectly fine to have portions that are a bit unmixed, especially the topmost portion of your soil mix. You could add more sand and clay on top for arid setups, and coco coir for humid setups.
I recommend providing your reptile with 4–12 inches of this soil layer of your bioactive substrate. Remember: The deeper the substrate is, the better—but also heavier.
7. Mix in the Biodegradables
Then scatter around a variety of different natural plant materials (leaves, moss, twigs, etc.) on top of your foundational bioactive soil layer. You want your layer of biodegradable toppers to be about 0.5–1 inches thick.
Unlike before, you want to leave a few big or multiple small patches of the soil layer exposed.
Additionally, you could also add wooden branches, cork bark, and stones of different sizes.
8. Transplant All the Plants
After getting the live plants, you need to prepare them before planting them into your bioactive substrate. This is key in getting rid of most, if not all, hitchhikers, insecticides, and pesticides from the plant.
Follow these steps to clean a live plant before transplanting:
- Take it out of the pot
- Gently remove the soil around its roots
- Run the plant under clean water
- Wipe off residual soil from the leaves and stems
- Soak the plant roots in a container with clean water
Leave it soaking in the water for about 10-20 minutes.
Next, you can finally transplant it into your pet’s herp enclosure. Ideally, you want the shorter plants in more open spaces and taller plants closer to the tank walls. Then give them all a good initial misting to promote good root growth.
9. Introduce the Custodians
Finally, introduce or ”seed” at 1–2 cultures of different types of clean-up crews. Isopods and springtails are considered the most crucial ones you need in a bioactive substrate.
The exact or estimated count of individual detritivores depends on the average size of each microfauna.
A single culture of tiny custodians like springtails could easily have a count of more than 100. In contrast, you may only find more or less 15 bigger custodians like isopods in one culture.
4 Key Factors for a Good Bioactive Setup
Aside from the five main ingredients in a bioactive substrate, four environmental factors can greatly affect its establishment: water, light, temperature, and ventilation. If these are not provided at optimal levels, then the bioactive substrate will quickly fail.
In creating a bioactive substrate, I have noticed that many keepers overlook the need to control for environmental factors that easily and greatly affect such a set-up.
More specifically, gecko owners need to factor in ventilation, humidity, light, and heat. All of these need to be closely monitored not only during set-up but throughout the reptile’s life in the tank.
1. Water
You would also need to regularly mist the enclosure to sustain proper humidity levels and adequately keep your plants watered and substrate moist. Additionally, you will need to provide fresh drinking water—ideally daily.
Discover what types are safe for reptiles in our article on water for geckos.
2. Light
A good plant light for bioactive reptile enclosures should meet the following factors:
- Full-spectrum light (400–700 nanometers)
- Good photosynthetic active radiation or PAR value (150–700 PPFD)
- Naturalistic daylight color temperature (5000–7500 K)
Having a basic LED and/or UV-B tube light in your lovely reptile’s enclosure is not enough to keep your plants vibrant and alive! You would need a good growth light to promote plant growth in your reptile’s bioactive setup [1].
3. Temperature
Both excessive heat and cold can easily kill your live plants and custodians. As such it is necessary to always monitor the temperature readings in your pet reptile’s tank using a reliable thermometer.
Find out what should look for in our thermometer buying guide!
Additionally, you’re heating set-up should be set to meet your pet’s thermoregulatory needs. One side should be cool enough, while the other should be warm enough and have a good basking spot.
4. Ventilation
Humid setups should have minimal vents for you to be able to maintain moderate to relatively high humidity. A good hygrometer like this one from Chewy will allow you to closely monitor the humidity in the tank.
This helps the living residents in the enclosure acclimate more easily during the cycle time, and also lets your little herp feel right at home once it is introduced!
Conversely, a tank for an arid set-up should have more ventilation holes and or slats—even entire mesh tops—to allow for sufficient airflow. So if, for example, you have a fully enclosed wooden tank, you would have to alter it accordingly.
Maintenance of Bioactive Reptile Tanks
Once the bioactive substrate has been completely set up inside the reptile tank and has been established for at least a month, minimal maintenance is required. This includes:
- Forking through the soil
- Spot-cleaning droppings
- Regular misting
- Cleaning the glass
- Trimming plants
- Top up biodegradables
- Adding custodians
- Giving custodians food
Just to give you a heads up, you will need at least wait for one whole month to pass to ensure that the plants have grown into the soil, custodians have reached a strong population, and the bioactive setup has stabilized as a whole.
Others prefer leaving it for 6 full months—or even more—before housing their lizard, snake, turtle, and other pet reptiles.
During this time, called the cycle time, it is normal to observe mushrooms and mold patches appear. Typically, your clean-up crew will take care of them so there is no need to be alarmed. It is not necessary to remove them from the bioactive setup.
Further Questions
Can you directly introduce a new reptile into a bioactive enclosure?
No, a quarantine period is still necessary—for at least one whole month. Owners have to make sure that their pet reptile is fit and ready for such an enclosure, with no parasites, fungal issues, and other illnesses. Furthermore, the bioactive setup itself requires a minimum of one month before it becomes well-established.
How often do you need to change a bioactive substrate?
Unless the bioactive substrate was not properly established, there is no need to ever change or replace it with a newly prepared batch. Doing so is unnecessary as the established detritivore colonies and well-rooted plants will be greatly disturbed and could be negatively affected.
What is the perfect bioactive substrate recipe?
There is no perfect bioactive substrate recipe. It varies between different reptiles. Generally, though, arid bioactive substrates have 60-70% soil, 20-30% equal parts clay and sand, and 10-20% extras like gravel. Meanwhile, common humid bioactive substrates have 50-60% soil, 20-30% coco coir, and 20% extras like moss.
Summary of How to Make a Bioactive Substrate
For a fully bioactive substrate with drainage, soil, leaf litter, plants, and microfauna to flourish, reptile owners also need to provide appropriate provisions for water, light, heat, and ventilation in the enclosure.
Preparing and establishing a good bioactive substrate for a reptile tank takes a lot of time and resources. It can be a challenging task to accomplish but it is not impossible. It is also important to perform setup maintenance whenever needed.
Sources
[1] http://publish.illinois.edu/non-traditionalspeciesclub/files/2021/04/March-Newsletter.pdf